Quantcast
Channel: Best Way to Reheat Food – The Bestest Ever!
Viewing all 74 articles
Browse latest View live

How to Reheat Jalapeno Poppers

$
0
0
Image Credit: elsie.hui w/CC License

Image Credit: elsie.hui w/CC License

Jalapeno poppers!!!!! Just reading the name gives me hunger pains and makes me start to salivate like one of Pavlov’s dogs. These little treats pack a big punch and they are just super delicious when steaming hot! So what happens if you got a bunch of poppers sitting around, maybe in the refrigerator, what is the best way to reheat them, so that they are almost as good as when you first had them?

Well, it is a good thing you ended up on this page, as I am going to highlight how to reheat jalapeno poppers. Below is a really quick guide that will showcase the do’s and the don’ts .

Reheating jalapeno poppers is pretty easy and if you have patience and a couple of minutes, you should get these golden nuggets of heat/bliss warmed up in no time. What you need to do is follow the simple steps below:

Steps

  • The first thing you need to do this preheat the oven and set it to 450°F. If you have a broiler option, set it to that option as well.
  • Place the poppers in an oven safe container or a baking sheet and let them heat up for about 5-6 minutes
  • You are going to want to keep an eye on them to ensure they are not starting to get too crisp or burnt
  • Once they have been heated up to the proper temperature, you can take out and enjoy.

What If they are Frozen?

If you are dealing with frozen jalapeno poppers, you can use the oven method above, just keep them in the oven a bit longer. You could probably aim for 10-12 minutes, just check to ensure they are fully warmed up and not cold.

Can I Refry Them?

The best option is to use the oven and bake them if you want to reheat the poppers up properly. Throwing them in frying pan or a deep fryer is just going let you end up with something that is super oil. It is not a good idea and is not very palatable as well.

Don’t Use the Microwave

If you value your jalapeno poppers, then definitely stay away from the microwave. There is nothing but tears and soggy food if you choose to go this route.

Why the microwave sucks, is that when it comes to food that is deep fried/fried, it is going to come up soggy and disgusting. It won’t have the same crisp texture, as a microwave is incapable of doing that. It will get them piping hot though, just not what you are used to. If you are super hungry and do not care about delicate textures and amazing taste, then go ahead and zap them. They will be hot and they will satisfy your hunger urge, so who cares right ?


How Do You Reheat Tater Tots? See 2 Methods That Will Guarantee Success

$
0
0
Image Credit: Mr.TinDC w w/CC License

Image Credit: Mr.TinDC w/CC License

How do you reheat tater tots? It is a good thing you landed on this page, because I am pretty sure you want to be absolutely sure about how to reheat those little golden nuggets of awesomeness known as tater tots. Well, you are in the right place, because I am going to highlight the right and wrong ways to go about reheating this meal, some of which are an absolute no no.

1. Do Not Even Consider the Microwave

Despite what people say, you should never ever ever ever reheat tater tots in the microwave. Warming up your tater tots is almost the same as reheating french fries and the end result is just soggy disgusting mush. Fried foods fail when heated in the microwave and as such you either need to try and re-fry them or throw them in the oven. If you want to waste your food, or don’t mind eating mush, then by all means zap them if you like.

2. Pan or Deep Fry

If you want to go about reheating your tater tots the proper way, then the best option is to pan or deep fry them. This is guaranteed to give you back the texture and taste when you first had them, that golden and deliciously crispy exterior.

Steps:

  • If you have a deep fryer, you could toss the tater tots in there and let them re-fry for a minute or two. They should be just like when you first had them.
  • If you do not have a deep fryer, you could put a skillet or pan on a flame
  • Coat it with non-stick spray, or a little bit of oil.
  • Once the pan is heated up properly, throw in your tater tots.
  • You can allow them to heat up on one side for about 1 minute and then flip then.
  • Once you feel they have been adequately heated up, take out and place on some paper towels to absorb the excess oil.
  • If done properly, then should be super hot inside and golden crispy on the inside.

3. Use the Oven

Another option to consider when looking about warming up or reheating tater tots is by using the oven. This is not a method that will take a short time, so be prepared to wait! The good thing about this is that those tots are going to be golden brown and crispy and oh so steaming hot.

Steps:

  • Preheat the oven to 350°F.
  • Place the tater tots in an oven safe dish
  • Cover the dish with aluminum foil.
  • Allow them to heat up for 15-25 minutes.
  • Keep checking to make sure that they are not over done or burnt, you want them heated up perfectly and not all stoves heat up the same.
  • Once they are steaming hot, you can now take them out and enjoy.

How Do you Reheat Gravy

$
0
0

best-way-to-reheat-gravy

How do you reheat gravy? Do you have some left over in the fridge from last night’s dinner? Froze some from thanksgiving and you are looking to bring back the magic? Well, you are in the right place as below I am going to highlight some pretty quick steps that you can take when it comes to warming up and reheating gravy.

Microwave

I must say, the microwave is definitely the easiest option that you can use when it comes to reheating gravy. This is going to take only a couple of seconds and you can be guaranteed that it is going to come out steaming hot, just like when it came off the stovetop.

Steps

  • The first thing you want to do is place the gravy in a microwave-safe container.
  • You might want to cover it with a paper towel or saran wrap, just in case it starts to bubble up.
  • Zap the gravy for around 30 to 45 seconds or until steaming hot.
  • Take out and serve with whatever meal you wanted it to go along with.

The Stove Top

If you don’t have a microwave or you just do not like using them, then you could also consider the stovetop, which is another good option to reheat your gravy. This is pretty quick and it will only take a couple of minutes to get it perfect.

Steps

  • Ideally it would be good to do it in a double boiler, but if that is not available, you could also just do it in a regular pot.
  • Turn the heat very low and just allow the gravy to warm up slowly.
  • After a couple of minutes, it should start to bubble, at this point it is perfect.
  • Now you can serve it with whatever meal.

Crock Pot

If you have frozen gravy, you could also go about reheating it in the crockpot. What you find is that this is a lot easier, as you can leave it simmering until you’re ready to use it.

Steps

  • If the gravy is frozen, allow it to defrost in the refrigerator overnight.
  • Once defrosted, place inside of the crockpot.
  • Set it and allow it to warm up for when you need it. By the time you have finished preparing your meal, it will be nice and steaming hot.

How to Reheat a Frittata. It’s Pretty Easy, Nothing To It

$
0
0
Image Credit: avlxyz w w/CC License

Image Credit: avlxyz w w/CC License

How do you reheat a frittata? That’s a pretty serious question to ask, because trying to heat up this egg dish can be easy, but if you can make a mistake and mess it up if you overdo it in the microwave. Regardless, you can take a look at the quick guide below that will highlight the best options available to you.

Try the Microwave

Even though I am not a fan of the microwave, it could be the quickest option available when it comes to reheating your frittata. You need to be very careful, because if you reheat it too much, the frittata could come out super rubbery, simply because the microwave and egg-based dishes are not a good combination. However, if you just find that sweet spot where it is heated up perfectly, then you should be good.

Steps

  • Place the frittata in a microwave safe container
  • Cover with a damp paper towel.
  • Zap it for 15-30 seconds or until heated up fully.
  • Be careful not to overheat it, as it could come out rubbery and disgusting.

As you can see, simple and to the point, nothing that will take a long time. A couple of seconds and you are done.

The Oven

The perfect option for reheating and warming up your frittata is definitely the often. It will take a longer time, but it will come all perfect and it would definitely be worth the wait.

Steps

  • What you will need to do is preheat the oven to 350°F.
  • After that put the frittata in an oven safe dish and cover with aluminum foil.
  • Place inside the oven and allow it to reheat for about 20 to 25 minutes (depending on if it was in the fridge or the heating efficiency of the oven).
  • If it is not fully reheated after 20 minutes, you can leave it in there for a couple more minutes ensure that it is well done.
  • Once it is steaming hot, you can take out, serve and enjoy.

Reheat Rotisserie Chicken

$
0
0

best-way-to-reheat-rotisserie-chicken

How do you reheat rotisserie chicken? That’s actually a good question and I am pretty sure you want to know the right way to warm up the bird properly. This is actually pretty easy to do and below I have highlighted a quick guide that will show you the best options available, that should have this bird reheated and ready to be devoured in just a couple of minutes.

Microwave

If you want to go about reheating a rotisserie chicken, you can always try the microwave as this is also another good option and will have the bird steaming hot in just a couple of seconds.

When you are reheating the chicken, please keep in mind that sometimes a microwave does not heat everything up evenly and you might have cold spots. So to be on the safe site, make sure the bird is fully heated the way you like it, before digging in.

Steps:

  • Take the bird out of the fridge and place in a microwave safe container.
  • Zap it for maybe 30 seconds to 1 minute (depending on the size and how cold it is).
  • Make sure there are no cold spots and that it is properly reheated.
  • Once you are finished, you can take out, serve and enjoy.

Oven

If you want your rotisserie chicken to be heated properly, you could always go with the oven option. While this method is going to take a longer time for you to get everything heated properly, I somewhat like it better than the microwave, as you are guaranteed to get everything heated evenly and if you love a slightly crispy exterior, the oven is capable of that.

Steps:

  • Preheat oven to 350°F.
  • Place the rotisserie chicken on an oven safe dish.
  • Cover the chicken with foil.
  • Place in oven and allow the chicken to reheat for 20-30 minutes, depending on the size of the chicken and if you had it in the fridge.
  • Once you feel it has been reheated to the level that you want, take out and enjoy.

The Stove Top

You could also use the stove top as another method to reheat your rotisserie chicken. This is another quick method, but not always the best as if you are doing a whole chicken, this option would not work.

Steps:

  • You are going to want to cut the chicken up in strips. If you it is small enough to fit in the pan, then you don’t have to cut it up.
  • Heat a skillet or pan and add some non-stick spray or a small amount of oil.
  • Throw the piece/pieces of chicken into the skillet/pan
  • You are going to allow it reheat for a couple of minutes, constantly moving it around and flipping it where needs be.
  • Once finished, you can take out and serve.

How to Reheat Baked Ziti? Take a Look on the Best Options

$
0
0
Reheat Baked Ziti

Photo by Rooey202

Can you reheat baked ziti? I am pretty sure you might have some in the refrigerator and you want to know if it is possible or not. Well the answer is yes, it is doable and it is a good thing that you came to this website, as I have crafted a quick little guide that will look at the different reheating options that are available.

The Oven

When it comes to reheating baked ziti, the best option is to do it inside of the oven. It is going to take some time to get everything heated up properly, but it is definitely worth the wait.  It is basically going to taste the same as when you first had it. This will also work in the toaster oven, so you can look at that as an option if a conventional oven is not available.

Steps

  1. The first thing you are going to do is to preheat the oven to 350°F.
  2. You are then going to place the baked ziti inside an oven safe dish or baking sheet.
  3. You are then going to cover it with aluminum foil.
  4. You will now place the ziti in the oven and allow it to reheat for about 15 minutes.
  5. After 15 minutes, remove foil and allow it to finishing reheating for another 15-20 minutes more.
  6. Once the top begins to bubble, it should steaming hot and ready to be enjoyed.

The Microwave

The microwave is not really good at reheating pasta, especially baked ziti. There is a reason why it is “baked”. However, if the microwave is the only option available or you are too hungry to care about taste/texture, then you can give it a try.

Steps

  1. Take the ziti and place in a microwave-safe container.
  2. Zap it at low to medium heat for up to one minute.
  3. Take out and see if it is reheated properly. If not, give it a couple more seconds in the microwave.
  4. Take out and enjoy.

What If It Is Frozen?

A lot of people like to freeze baked ziti and have it later on. It can be kept up to 2 months in freezer and when you take it out and reheat it, it will taste the same as when it was first made.

Steps

When it comes to reheating frozen baked ziti, you are going to first determine when you want to eat it. If you want to eat it right away, you can take it right out of the freezer and reheat it in the oven.

Out of the Freezer Steps

  1. Preheat the oven to 350°F.
  2. If it’s already in an oven safe container, you can place it directly into the oven, if not, you are going to want to take it out and place it in something that can.
  3. You are going to also want to cover it with aluminum foil.
  4. It is going to take a lot longer when it is frozen, so you can expect it to be in the oven for about an hour.
  5. 15 minutes before it is finished, you are going to want to take the foil off, so that it can nice and bubbly.

If Defrosting the Fridge

If you do not plan on having the baked ziti right away, you can allow it to defrost in the refrigerator. After a couple days, it should be fully thawed out, then you can use any of the methods that I used above to go about reheating it.

How Do You Reheat Blueberry Pie? Find Out How

$
0
0
Blueberry Pie

Photo by Family O’Abé

How do you reheat blueberry pie? Do you have a whole pie or slice and want to know the best way to go about reheating it to make sure it tastes amazing? Well it is a good thing you landed on this page, as down below I am going to highlight the best options available to you.

The Oven

When it comes to reheating blueberry pie, the oven is by far the best option available. It is going to take a couple of minutes to get it totally warmed up, but it is definitely worth the wait.

Steps

  1. The first thing you’re going to want to do is preheat the oven to 200°F.
  2. You are then going to place the pie inside the oven and allow it reheat for 10-20 minutes.
  3. You need to remember that you are not baking it again, you just want to get it warmed up and really hot.
  4. You can keep checking to make sure that it is warming up perfectly. If you find that this is still cold after the 10 to 20 minutes, you might have to keep it in the oven for a little bit longer.
  5. Once it is finished, you can now take it out and enjoy.

This method can also be used if you have a toaster oven available.

Microwave

You can also use the microwave to reheat your blueberry pie and this is much quicker than using the oven.

  1. Place the pie in a microwave-safe container are dish.
  2. Allow it to heat up for a couple of seconds.
  3. Check to see if is warm enough, if not you might have to let it go for a couple more seconds.
  4. Once finished, take out, serve and enjoy.

What If it’s Frozen?

There are times when a frozen blueberry pie will be needed to be reheated. How do you go about doing this you ask? Well you are going to want to make sure that the pie is thawed out properly. Generally you are going to want to take the pie out of the freezer and allow it defrost in the refrigerator for a couple of hours. Once it is totally defrosted, you can use any of the methods mentioned above to warm it up.

If you have a frozen pie and want it warmed up right away, you will have to use the oven method. You should note that it is going to take much longer this way and you can expect the pie to be fully reheated in 40 minutes to an hour.

How Do You Reheat Quinoa? Find Out How!

$
0
0
Reheat Quinoa

Photo by SweetOnVeg

How do you reheat quinoa? I am pretty sure you landed on this page, because you want to make sure you are using the right methods to go about reheating this super food. The good thing is that when it comes to warming up quinoa, the process is actually pretty easy and it doesn’t take a lot of effort to get it perfect.


The step-by-step guide below will highlight the different options available and how you go about reheating the proper way.


Using the Microwave

The microwave is his easiest and quickest method to use when it comes to reheating quinoa. Many people opt for this as it gets the quinoa steaming hot in just a matter of seconds, while still maintaining the original taste and texture.

Steps:

  1. Place the quinoa in a microwave safe container.
  2. If it is clumped together, you will want to try and spread it out evenly.
  3. You will now sprinkle some water (Not drown it) on it. You just want enough to moisten the grains, maybe use about 3-4 tablespoons of water.
  4. You can also cover the bowl or dish with a damp paper towel and use less water if needs be.
  5. Zap the quinoa on high heat for about 30 seconds. Check to ensure that it is heated properly. If not allow it to heat up for a couple more seconds.
  6. It should now be steaming hot, you can now take out, serve and enjoy.

Using the Stove

The stove top is another method to consider, but you should be aware that it takes a lot longer than the microwave. However, it still gets the job done and you can be guaranteed that the quinoa is going to get heated properly.

Steps

  1. Place the quinoa in a pan and place on a medium flame.
  2. You can add a little bit of olive oil or water to give it some moisture.
  3. You are going to want to stir the quinoa continuously over the medium flame.
  4. This process should take only a couple of minutes, but if you find that it is still cold, you will want to let it sit for some more time.
  5. Once it is steaming hot and fully reheated, you can take out and serve.

Reheat Hot Chocolate

$
0
0
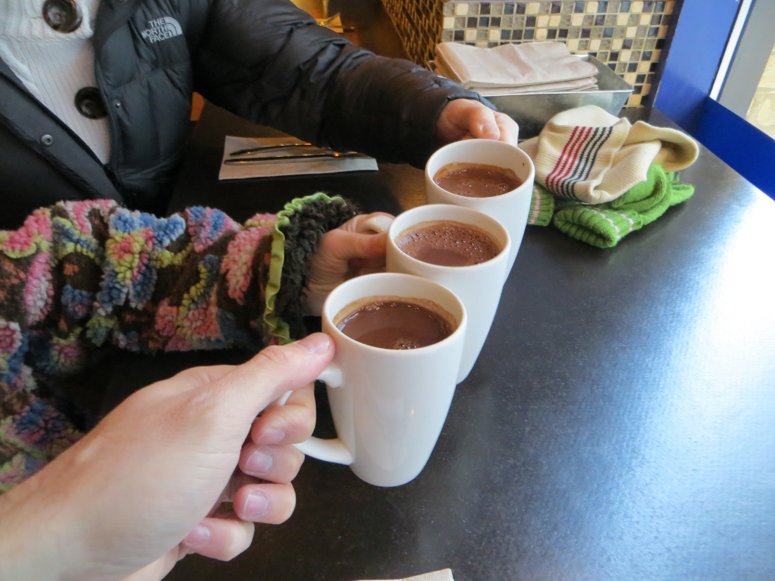
Reheat Hot Chocolate

Photo by regan76

How do you reheat hot chocolate? Did you make an amazing batch of hot chocolate last night and you just had to keep some in the refrigerator so that you could enjoy it the next day? Now that you are ready to enjoy this drink, I am pretty sure you want to know what options are available to you. Well, it is a good thing that you landed on this webpage, as I am going to highlight what steps you can take to make sure this exquisite drink is warmed up perfectly, just the way you like it.

The Microwave is Pretty Quick

I am pretty sure that is a first thing that came to mind then you know what, the microwave is honestly the quickest way to go about reheating hot chocolate. It will only take a couple of seconds and you can be guaranteed that it is going to be piping hot, ready to be enjoyed.

Steps:

  1. If the hot chocolate is not already in a microwave-safe mug, you can go ahead and pour it in there.
  2. You are not going to want to microwave the chocolate at high heat for about 30 seconds.
  3. If you had it in the fridge, it might take a longer time to get fully heated up.
  4. Stir it around, then check and see that it is at the desired temperature. If you are okay with the temperature, take out and enjoy.
  5. Be careful while drinking, as it could be really hot.

The Double-Boiler Might Be Better If You Care

If you have some gourmet, well-made hot chocolate, then it is obvious that you enjoy quality. While the microwave is good, it really depends on the grade of hot chocolate that you are planning on reheating. The ideal way is through the use of a double boiler, even though that will take a lot longer. The good thing about this method is that you can go about reheating, without worrying about your chocolate scorching or hardening.

Steps:

  1. Turn the stovetop on a medium flame.
  2. You are then going to pour the hot chocolate into a double boiler. The double boiler is ideal, as it is harder for things to burn.
  3. Continuously stir as the chocolate begins to heat up.
  4. You should do this for about 4 to 5 minutes, depending on how cold the chocolate is.
  5. Once you feel that it is heated up enough and it is steaming hot, you can take out and enjoy.

Reheat Chocolate Chip Cookies

$
0
0
Reheating Chocolate Chip Cookie

Photo by rottnapples

How do you reheat chocolate chip cookies? Do you have a batch of chocolate to cookies that you just want to get warmed up as they have either been sitting around for too long, been kept in the fridge or you were keeping them in the freezer for a taste bud enjoyment day? Well, warming up these cookies is a very easy task and below I am way to show you what options are available to you to get the job done.

The Microwave

The microwave is actually the quickest option available when it comes to reheating your chocolate chip cookies. It will only take a couple of seconds to get warmed up and this will make them even more delicious than they already are.

Steps:

  1. Place the chocolate chip cookies in a microwave-safe container or plate.
  2. Let them heat up for 20 to 30 seconds.
  3. They should be pretty warm and nice at this point, so you can take out and enjoy.

The Oven

The oven is another option that is available when it comes to reheating your cookies, the only thing is that it will take a lot longer to get everything warmed up.

Steps:

  1. You are going to preheat the oven to 350°F.
  2. You can now place to cookies on a baking sheet or an oven safe container.
  3. You can place the cookies inside of the open and allow them to heat up for about 5 to 10 minutes.
  4. You just want them to get warm and not bake them all over again, that is why they are kept in oven for such a short period of time.

What If They Were Frozen?

If for some reason you are dealing with frozen chocolate chip cookies, you are going to want to let them defrost and thaw out to room temperature before you go ahead and reheat them. This will take only a couple of minutes, depending on how many cookies you plan on thawing out. Once defrosted you could use any of the steps that I had mentioned above.

How to Reheat Hot Cross Buns – We Will Show You How!

$
0
0
Reheating Hot Cross Buns

Photo by jemasmith

How do you reheat hot cross buns? Did you make a super batch of hot cross buns and they have been sitting out too long, been kept in the fridge or even frozen and you want to warm them up? Do you know what methods are quick and easy and which ones offer the best result? Well, continue reading below, as I am going to show you the proper ways to warm up hot cross buns and which options are available.

The Microwave

The microwave is a quick option, but for hot cross buns, it can be very tricky. If you zap them too long, they can come out soggy and you definitely do not want that to happen. While I would recommend the oven, if you use the microwave smartly, you really should not have an issue.

Steps:

  1. Place the hot cross buns in a microwave-safe container or plate.
  2. Zap them for about 10-20 seconds. You just want to get them warmed up at the right temperature. If you keep them in too long, they are going to come out soggy.
  3. After the 10-20 seconds, if they are to your liking, you can take out and enjoy. If it needs to heat up a bit more, you can do it in 10 second intervals.

The Oven

Reheating hot cross buns in the oven is definitely the best option available. The downside to using the oven is that it takes a longer time to warm the buns up, but the wait is definitely worth it.

Steps:

  1. You are going to preheat the oven to 350°F.
  2. Take the hot cross buns and place them either on a cookie sheet or an oven safe container.
  3. Place the sheet/container with the buns inside the oven and let them warm up for 10-15 minutes (might be longer if in the refrigerator)
  4. Remember, you are just heating the buns up, you are not re-baking them. So they will only be in the oven for a short period of time.
  5. Once they are steaming hot, you can take out and enjoy.

What If They Were Stored in the Freezer?

Sometimes people opt to freeze hot cross buns. If that is the case and you are looking to reheat them, then the best option is to let them defrost to room temperature and reheat them using the oven method above. You are definitely going to have to wait a little bit, as this is not a quick 10-15 minute process. But once the buns are defrosted and warmed up properly, you should have no problem enjoy this amazingly sweet treat.

Best Way to Reheat a Latte

$
0
0

A cup of Latte

So you want to know if you can or how to reheat a latte? I really should start off by saying, ‘why would you want to do that!’ Fresh is always better, but if you have some leftover, it is better than nothing.

Before I get ahead of myself, yes, you can reheat a latte and the way to do it is pretty simple. Below I show you how to get it done and please keep in mind, that whatever fancy design you had, that will be lost in the process.

The Microwave is the Quickest & Easiest Way

If you really want a quick method to reheat your latte, then the microwave is by far the easiest and fastest option available. Once you pop the latte in there, after a couple of seconds, your drink is going to be steaming hot.

Steps:

  1. If you have the latte in the original paper cup, you can put that in the microwave, if not, place it in a microwave-safe mug.
  2. You are going to microwave the latte at high and depending on the wattage of your microwave and how hot you want it, this can be anywhere from 30 seconds to 2 minutes.
  3. Please keep in mind that if it was cold, the heating time might be on the higher side.
  4. Once heated, stir the liquid around and taste to see if it is heated to the level that you want it at.
  5. Once heated fully, take out and enjoy.

Tv One GIF - Find & Share on GIPHY

The Stovetop

Not everyone owns a microwave and if you are in this population, you could always reheat your latte on the stovetop.

This is not going to be as quick as the microwave, but it will definitely get the job done. Please note, that you do not want to let it reach boiling point, because there is a good chance that it will become bitter or the milk will begin to curdle.

Steps:

  1. Turn the stovetop on a medium flame.
  2. Pour the latte into a pot and place on the stovetop.
  3. You are now going to stir as it begins to heat up.
  4. After a couple of minutes, 2-5 (Depending on the heat of the stove), check to see it is at the desired temperature.
  5. Once it heated to your desired temperature, take out and enjoy.
  6. Remember to not let it boil, as you will essentially spoil the latte.

As I stated above, reheated latte will not be as good, as one freshly made, but if you can’t do any better, then giving it a quick reheat is better than nothing.

Best Way to Reheat Beignets

$
0
0

Beignets on a plate

Whaaaaaaaaaaaaaaaaat, you actually have some beignets left over from the fresh batch you made a couple of days ago? You want to know if you can reheat beignets? The answer is yes, but you should not do it….that is a travesty.

Beignets are best when freshly made and reheating them does them no justice….but sometimes we are put in a situation where we have to do what we have to do.

The Oven

If you want a quick reheat, then you can use the oven. You just need to keep them in the oven for a couple of minutes to ensure that they are warmed up.

Steps

  1. preheat the oven to 350°F
  2. Place undusted beignets in oven.
  3. Let them heat up for 5 minutes or a bit longer (depending on the heat of the oven).
  4. Once you feel they are adequately heated up, take out and serve.

Disney GIF - Find & Share on GIPHY

Using the Microwave

There is no way to replicate the texture and fried taste of beignets by reheating them in the microwave….it just won’t work. If you just want to have them warm, then the microwave will do, but just remember it is not going be the same as the ones freshly made.

Steps

  1. Take the beignets and place in a microwave-safe container.
  2. You are going to zap them for a couple of seconds…20-30 on medium heat to warm them up.
  3. Once you feel that they are heated up properly, you can take them out.
  4. I would say enjoy to end it….but….yea, enjoy.

Best Way to Reheat Falafels

$
0
0

Falafels(Insert Homer Simpson drool)….mmmmmmmmmmmmmmmmmm falafels. I could eat a couple of these delicious little balls….but I have an article to write.

So, you ended up here because you wanted to know if you can reheat falafels. The answer is yes, but if you can, eat them fresh……because fresh food is better than reheated (yes we all know this, right?)

Reheating a falafel can be an easy process, you just need not be hungry and a little patience. The three options you can go with are reheat in the oven, toaster oven and a quick pan fry.

The Oven

The oven will get the falafels reheated and almost…almost like they were freshly made. It is not a long process and in a couple of minutes you should be good to go.

Steps

Preheat oven to 400°F (you want to reheat the falafels at a high heat, for a short amount of time.)

Place falafel in an oven safe container and place in the oven.

Let them heat up for 5 minutes.

Once fully heated, take out and enjoy.

The Toaster Oven

The toaster oven with essentially beat the same steps as above and you should get the same results.

Pan Fried

Another option to consider when it comes to reheating falafels would be a quick pan fry.

Steps

  • Heat a skillet/frying pan up on a medium flame.
  • Add a little oil to the skillet/frying pan
  • Throw the falafels in and give them a quick pan fry, till they are heated up.
  • Take out and enjoy.

What About the Microwave?

Fried foods turn to mush in the microwave and you would not enjoy the falafel heated up in this manner. If you just want to them up, then you could use the microwave, just be aware that the texture might change and they might come out soft and mushy.

Best Way to Reheat Fish Fingers

$
0
0

Fish FingersFish fingers or Fish sticks bring back a lot of good memories from my childhood. It was such a delicious snack and I actually have a craving for some 🙂

If you ended up here and wanted to know how to reheat fish fingers/sticks, below, I am going to show you how.

When it comes to fish fingers you really have 2 different reheating options.

The Oven

If you got some fish fingers that need reheating, then the oven is your best bet. It will only take a couple of minutes and when done, they should be crispy and super delicious.

Steps

  • Preheat oven to 375°F
  • Place the fish sticks on a baking sheet and covered them with foil.
  • Place in the oven for 5 to 7 minutes.
  • Remove the foil and let them set in the oven for another 5 minutes, so they get back to being super crispy.
  • Take out, let cool and enjoy.

The Frying Pan

Another way to go about reheating fish fingers is by throwing them in the frying pan. This can be a quicker process if you don’t have the time sit and wait for them to finish in the oven.

Steps

  • Heat up a frying pan/skillet on a medium flame
  • Put a little butter or oil to the pan and let it heat up.
  • Throw the fish sticks into the frying pan and let them heat up thoroughly on one side before flipping.
  • When finished, tae out, let cool and enjoy.

Say No to the Microwave

You can’t reheat fish sticks in the microwave, simply because they are just going to come out mushy and soggy. Fried foods do not hold up well in the microwave, so this should not even be an option. So stay awwwwwwwwwwwwwwwwwwwwwaaaaaaaaaaaaaaaaaaaaaaaaaaay from the microwave, it is a no go!

What If They Are Frozen?

If you have frozen fish fingers, it would be a good idea to follow the instructions on the box, as the cooking time would possibly be a lot longer than what I have listed above.


Best Way to Reheat a Panini

$
0
0

Panini in a plate

So you want to know how to go about reheating a panini? The process is not very complicated and you can get it piping hot in 5-10 minutes, depending on the reheating option you go with.

Below I show you the two options that you can use to reheat your sandwich as well as explain why you should definitely avoid the microwave.

The Stovetop

Reheating a Panini in a frying pan is really quick and it will get it piping hot in a couple of minutes. The same method used to reheat a grilled cheese sandwich is the same procedure done here.

  1. Turn your stove to a medium flame and apply some butter or nonstick spray to your skillet or frying pan.
  2. Once the pan/skillet is fully heated up place the Panini in.
  3. Let it reheat on each side for about 30 to 50 seconds (maybe longer if cold).
  4. Flip and reheat the other side.
  5. Once fully reheated, take out, serve and enjoy.

This is a really quick reheating option and you should be good to go in less than 5 minutes.

The Oven/Toaster Oven

Another good option to consider when reheating the Panini is using an oven or toaster oven. This is a longer process than the stovetop, but you will still get the job completed.

  1. If you want it a bit golden, butter each side of the Panini.
  2. Preheat oven to 350°F
  3. Place the Panini on baking sheet
  4. Heat on one side for 5 to 7 minutes then flip over to finish it off.
  5. The time might be a bit longer/shorter for some, so it is a good idea to continually check to make sure that the Panini is being reheated properly.
  6. Once you have heated it up, take out and enjoy.

Say no to the Microwave

Honestly, the best way to reheat your Panini would be in the oven or on the stovetop……. If you have a microwave, don’t even consider this as an option. When you put a Panini in the microwave, it is going to come out soggy and the texture is not going to be palatable. While it will be steaming hot, the texture is going to change so much, it is better you ate it cold.

So no microwaves, stick with the oven or the stovetop.

Best Way to Reheat Lamb Chops

$
0
0

Lamb Chops

Honestly, lamb chops have got to be the greatest meal ever created. They are so tender, tasty and I honestly could eat a plate right now.

Excuse my drooling, but if you are here, you are probably trying to find out how to reheat lamb chops. The big questions is why do you have leftovers? Everything should’ve been eaten off in one sitting.

Regardless of your reason, this tender meat can be reheated pretty easily and I am going to show you how to do it in a couple easy steps.

The Oven

When it comes to reheating lamb chops, the oven is a good option, it just takes some time to get it piping hot.

Steps

  • Preheat oven to 350°F
  • Cover lamb chops with aluminum foil
  • Place in oven for 10 minutes on one side and 10 minutes on the other
  • Depending on the thickness of the meat, it might be ready to go before the 20 minutes is up
  • If the internal temperature is 165 degrees Fahrenheit, then you can take it out.

The Stovetop

The stovetop is a quick way to reheat your meat, but you also need to ensure that you don’t overdo it and dry it out.

Steps

  • Preheat skillet over a medium flame
  • Add a little bit of oil or butter
  • Throw in the lamb chops and let them heat on each side for a couple of minutes (don’t keep them on too long)
  • Once fully reheated, you can take out and enjoy

The Microwave

Even though I am not a fan of the microwave, you can reheat your lamb chops in it. The microwave is the quickest option out there and it will definitely get it piping hot and succulent if done properly.

Steps

  • Place the lamb chop in a microwave safe plate/container
  • Cover with a damp paper cloth
  • Position the plate to the outside of the microwave turntable, as this will help the lamb chop from drying out.
  • Microwave on high for 2 minutes (this could be shorter or longer, depending on the power of your microwave)
  • Once the lamb chop is fully heated, take out and enjoy.

Best Way to Reheat Meatloaf?

$
0
0
meatloaf photo

Photo by Mr.Geguskov

One of the difficulties when it comes to reheating meatloaf is that a lot of people tend to dry it out when warming it up.

Reheating it is easy, but not understanding that heat can dry out the meat and make it unpalatable is something I will explain, as well as showing you the different options one can use when warming up meatloaf.

The Oven to Reheat Meatloaf

The oven is the best way to get your meatloaf warmed up. Where a lot of people go wrong is that they turn the oven up too high. With the high heat you will get the dish hot, but you also end up losing moisture in the process and what’s left is dried out meatloaf, which is nowhere close to what you had…

Steps

  • Preheat the oven to 225-250 degrees Fahrenheit
  • Place the meatloaf in a shallow dish and cover with foil. (Some people like to add beef broth or gravy before covering with foil to give it some moisture.)
  • Leave it in the oven for 20 minutes
  • Once finished, let it cool a little before serving.

The Microwave

The microwave is the quickest option available, however some people are against using it since they claim that it dries the meatloaf out. The reason for this is that they are doing it wrong and below I show you the right way to reheat.

Steps

  • Place the meatloaf in a microwave safe plate
  • Wrap the meatloaf with a damp paper towel
  • Microwave on a low setting for 2 minutes (maybe more depending on the overall power of the microwave)
  • Check to ensure that it is fully warmed up, especially in the middle. If not, let it heat up a bit longer
  • Once finished, let it cool before eating.

The Skillet

This is a different way to reheat meatloaf, but some people will often just throw it in pan/skillet, give it a quick pan fry. It works and it is also a good option to consider since you can heat it up and eat it as is, or make your own sandwich.

Steps

  • Preheat frying pan/skillet over a medium flame
  • Add a little butter or olive oil to the pan/skillet
  • Throw in the meatloaf and stir it around until fully heated up on both sides
  • Allow to cool, take out and enjoy

Best Way to Reheat Sausage Rolls

$
0
0

Reheat sausage RollsYummo…sausage rolls. Little pigs wrapped in a nice puff pastry. So you want to know how to go about reheating sausage rolls right?

The process is very simple and you have different options you can go with.

The Oven

The oven will get the sausage rolls crispy and hot, you just need to make sure you don’t overcook them.

Steps

  • Preheat oven to 375°F
  • Place sausage rolls on a baking sheet
  • Place baking sheet in the oven and let them heat up for 20 minutes
  • At this point, the rolls should be full reheated, at this time, take out and let cool a little before eating.

If They Are Frozen?

If you have some frozen sausage rolls, you will follow the same instructions above, you just have to keep in them in the oven for a longer time (35-40 minutes)

The Microwave

You can use the microwave to reheat sausage rolls, but be aware that you are not going to have the same crispy taste and it might actually be a bit soggy.

However, if the microwave is the only option you have, you can always give it a try as it is better than nothing.

Steps

  • Place sausage rolls in a microwave safe container
  • Reheat on high for 30 seconds to 2 minutes (depending on the power of microwave)
  • Once fully reheated, take out and enjoy.

How to Reheat Smoked Salmon?

$
0
0

Reheating Smoked SalmonHow to reheat smoked salmon! I know you landed up here, cause you probably got a piece of leftover smoked salmon from last night’s shindig. It was amazing when it was piping hot and you want to recreate that magic…don’t ya?

Below, we show you the quick and easy way to reheat your smoked salmon.

Use the Oven to Reheat Smoked Salmon

When reheating your smoked salmon, the oven is your best bet. It does take some time, but it will get everything warmed up perfectly.

Steps

  1. Preheat oven to 325 degrees Fahrenheit.
  2. Put the salmon in a baking dish or baking sheet.
  3. Add a small amount of butter on the top of the salmon. The fish can get dried out in the oven, so the butter helps to maintain the moisture.
  4. Place the salmon in the oven for around 5 minutes.
  5. Use a cooking thermometer and check to see if the internal temperature of the fish is at least
  6. If it is, then salmon is finished and ready, if not leave it in for a minute or two, till it reaches 145 degrees Fahrenheit.
  7. Allow it to cool a little bit before eating.

What About the Microwave?

Aside from stinking up your microwave, it is not a good idea to reheat your smoked salmon in it. The microwave can change the texture of the fish, especially since it is so delicate. Most people often zap it on high power and are totally disappointed when it comes out inedible. You can use the microwave, but I am not a fan of it and the oven gets you the best results.

If you do plan on using it, use the following steps.

Steps

  1. Place salmon in a microwave safe dish and cover with a damp paper towel
  2. Microwave at medium power for 30 seconds, then check to see if it is still cold.
  3. Repeat step 2 until the smoked salmon is fully heated.
Viewing all 74 articles
Browse latest View live